With my Keyboard Controller completed it was time to get started on my next project!
With my Keyboard Controller completed it was time to get started on my next project!
The Theremin is a musical instrument I have been looking forward to experiencing for many years, so I was very excited when I received the PAiA Theremax Theremin 9505D Kit from the Peasant as a gift. While it is always exciting receiving and learning a musical instrument it is an even greater experience to build your own as I found out with the Keyboard Controller!
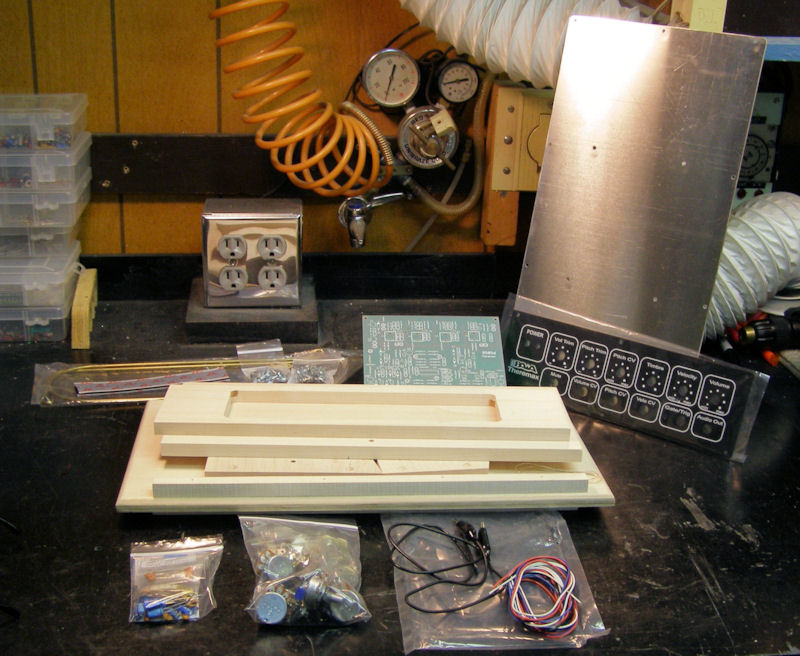
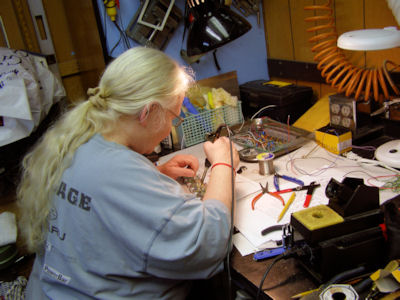
So with excitement I sorted out my parts, made sure everything was there, stained all the wood 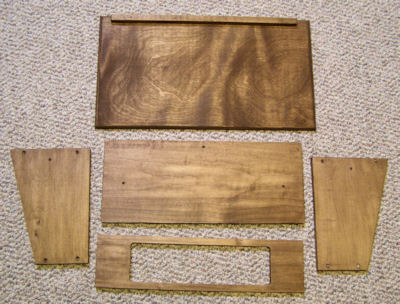 and started populating the board.
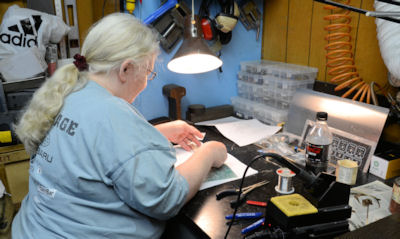
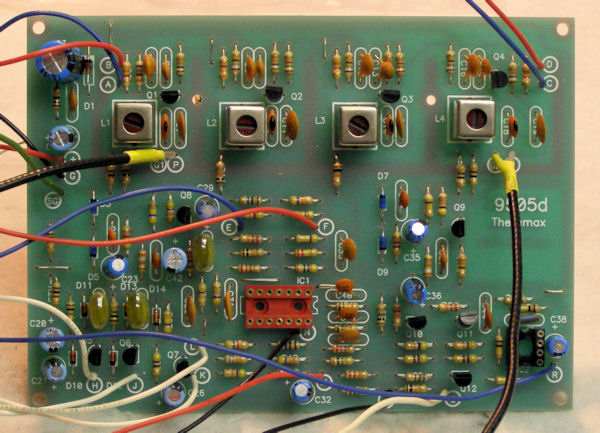
Following along with the instructions given with the kit, I completed the board and then had an eureka moment! "I wonder" I thought "if anyone has noticed any mods which should be made?" "Perhaps I should direct my attention to some researching." I reviewed all the information, comments and discussions I could find on the web and sure enough came across some mods to the circuit board, among other things, which were suggested. Here is where one says "note to self: research first next time!"
Before I started any mods I had some concerns about certain suggestions that had been made by people, so I decided to go directly to Scott at PAiA with my questions.
The only mods suggested by Scott are already incorporated into the newer kits, but were not in mine. At this point I have to say how amazing Scott was - he promptly answered my email and provided me with all the information and advice I would possibly need and then some!
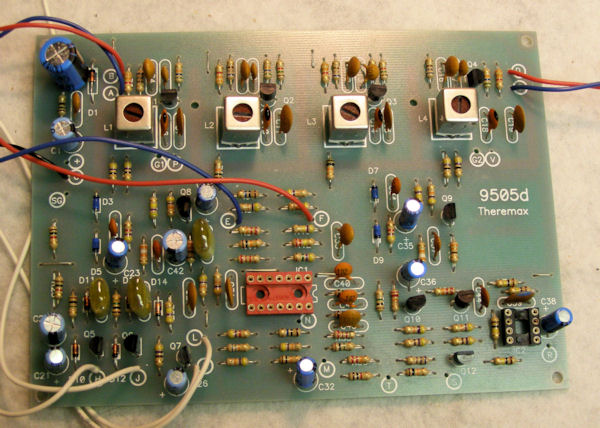
All I can say is - my desoldering skills are getting much better!
I had to exchange two .0047uF capacitors for 100pF (C39 and C44)and one 33pF for a 100pF(C37). In addition, I added a 6800ohm resistor to lugs 3 and 2 of my timbre pot (R81).
My own alteration to the circuit board was more for personal preference. I used sockets for the integrated circuits and did not insert the ICs until the last moment. The population of the board was completed.
The next step was to put in the panel controls. Here I opted to use my own knobs, partially to color code to the standard of our existing synth system and partially because I like color or uniqueness in my knobs. The Peasant tells me though, that I can no longer use the term "our" existing system since with his new SynthBend Controller Project, I will need to start making a system of my own!!
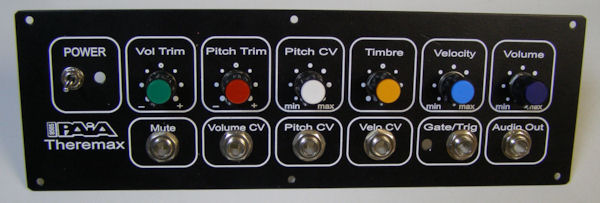
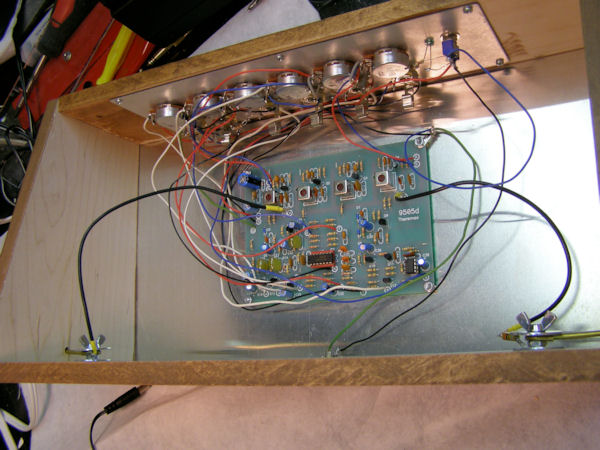
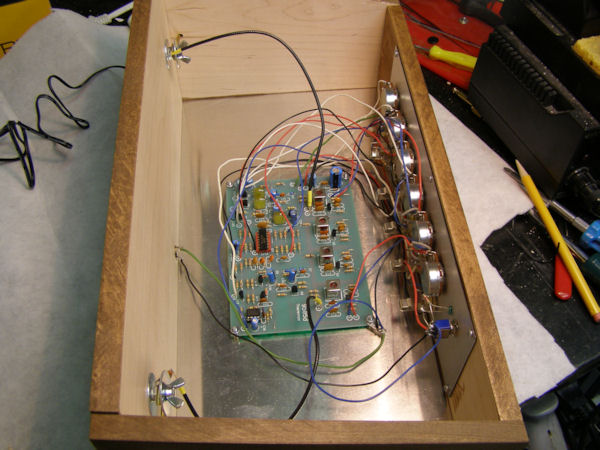
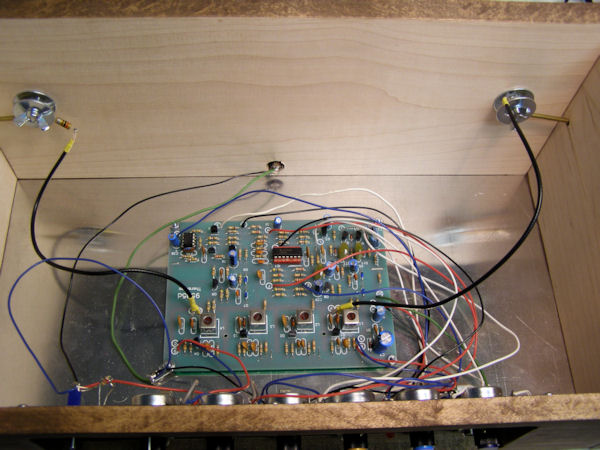
With the hardware in, the next step was to first wire the panel,
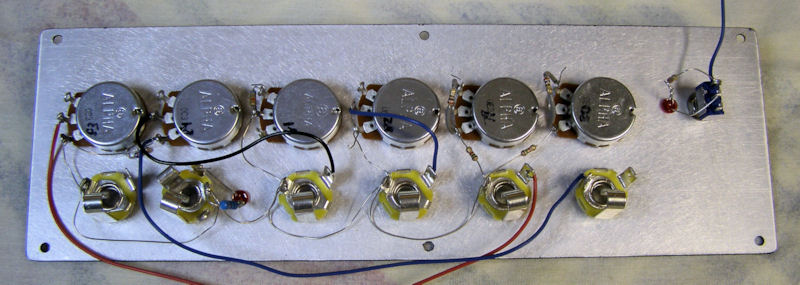
and then complete the wiring from the circuit board to the panel.

As you can see by the pictures above, on expert advice from the Peasant I used shrink tubing on the shielded cables. I also added insulated tubing on the lead ends of the resistors soldered to the pots.
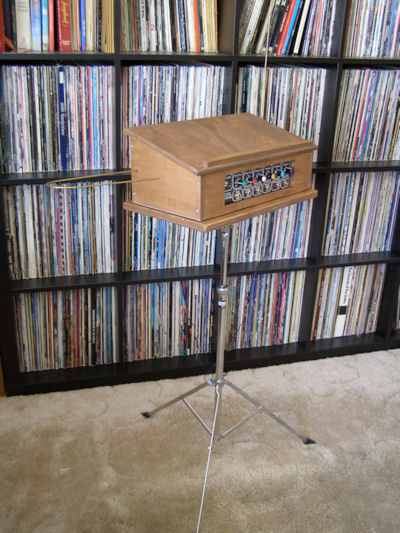
Next came the case assembly and the power supply. Again, drawing on the Peasant's considerable knowledge and expertise (I have to be sure to say things like this, at least until I have my own synth system built) I decided on a further modification by choosing not to hard wire the power supply. Instead, we matched the appropriate jack to the DC power plug and, with the Peasant's help, I drilled a hole for the jack in the back of the case. Lastly the Pitch and Volume antennae were mounted and wired. And ... it was done!
Testing went well, except for a very newbie mistake, and here's the story. No blue smoke and all was as it should be, but, the LED for the power switch didn't seem to work. More desoldering practice! New LED and ... still it didn't work! I'm sure you all know where this is going ... the age old question, the first question techs ask .. did you turn it on? Sigh! Bet the first one was just fine!
Tuning was easy and the instrument worked perfectly. The Thereminist however has a lot of practice to do ![]() ! Our children and grandchildren have had alot of fun and one of our daughters wants to build her own.
! Our children and grandchildren have had alot of fun and one of our daughters wants to build her own.
All that was left was to make a stand which could easily be adjusted to any height. Luckily The Peasant had an extra precussion stand he was not using and I snapped it up. The piece of plywood I found needed alot of sanding before I could stain it and mount it on the stand.
I would highly recommend this kit for anyone who wants to build a Theremin - it is an easy build with a beautiful instrument at the end of it.
Now it's time to build a Synthcase of my own!